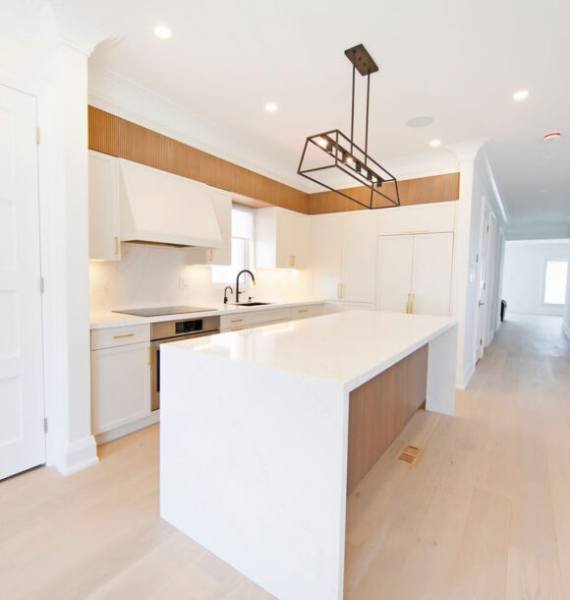
Most remodel problems do not start on demolition day. They start weeks earlier, on a piece of paper, when somebody writes down a number that was slightly wrong. A quarter inch does not sound like much. Then the cabinet run comes up short against the wall, the fridge door hits the island, and suddenly there is a change order nobody planned for. The frustrating part is that these numbers are all knowable in advance. They just get skipped because the exciting decisions, like tile and countertop color, feel more urgent than a tape measure.
Kitchen remodeling in Sterling, VA, runs into this more often than homeowners expect, especially in houses built before 2000. Walls are rarely square. Floors slope. Older Northern Virginia builds have quirks that a quick sketch will never catch. Perhaps that sounds pessimistic. It is not meant to be. It just means the measuring stage deserves more respect than it usually gets.
Here is why this matters financially. A wrong measurement caught during planning costs a conversation. The same mistake caught after cabinets are ordered costs weeks and real money. WellCraft Kitchen and Bath sees this pattern repeat, and the fix is almost always the same. Measure the awkward things early, before anything gets ordered.
Wall Length Measured At Three Different Heights
This one surprises people. Measure the same wall at the floor, at counter height, and near the ceiling. Write down all three numbers.
They will not match. That is normal. Drywall bows. Studs twist over time. Older homes settle unevenly.
Cabinet installers work to the smallest number, because a cabinet run has to clear the tightest point. If a planner uses the widest measurement, the last cabinet will not fit. That gap gets covered with filler strips, which look fine, or it gets forced, which does not.
Take the three readings. Use the shortest one for planning.
Appliance Door Swing and Clearance Space
Appliance specs list width, height, and depth. They rarely list the part that causes trouble, which is how much room the door needs when it opens.
Think about what actually happens in a kitchen:
- A refrigerator door needs room to open past 90 degrees before the crisper drawers will slide out.
- A dishwasher door drops down and eats about 24 inches of floor space.
- An oven door does the same, and someone has to stand there holding a hot tray.
- Two of these opening at once, during a holiday dinner, is a real scenario.
Measure the open position, not the closed one. Then measure what is across from it.
The Americans with Disabilities Act guidance suggests 40 inches of clearance between opposing counters in a working kitchen. Residential homes are not required to follow that standard, but the number is a useful floor. Many homeowners find 42 to 48 inches more comfortable when two people cook together.
Ceiling Height Before Ordering Upper Cabinets
Ceiling height gets treated as a fixed number. It is not.
Measure at each corner of the room and once in the middle. A half-inch of variation across a ceiling is common. An inch is not unusual in older construction.
This decides whether cabinets can run to the ceiling or need a soffit or trim gap above them. Both options work. The problem comes when the plan assumes a flat ceiling and reality delivers something else.
Also check what sits above. Ductwork, plumbing stacks, and recessed lighting cans all live in that space. A tall pantry cabinet cannot go where a duct runs.
Window and Door Trim Distance from Corners
Cabinets do not just meet walls. They meet trim.
Measure from the corner of the room to the outer edge of any window casing or door casing. Then measure the trim thickness itself. Most casing sits between half an inch and an inch proud of the wall surface.
That thickness matters when a cabinet needs to sit next to a window. Without a scribe or filler, the cabinet door will hit the trim and never open fully. It is a small detail that shows up every single day once the kitchen is finished.
Sink placement under a window has its own rules. Check that the faucet has clearance to swing back without hitting the sash.
Plumbing and Electrical Locations Before Layout Changes
Moving a sink sounds simple. Moving the drain that serves it is a different conversation.
Write down where the existing drain, supply lines, and shutoffs sit. Measure their distance from the nearest corner and their height off the floor. Do the same for the electrical panel feeds and any dedicated appliance circuits.
Drain lines need a slope to work. The International Residential Code calls for a quarter-inch of fall per foot on most residential drain lines. Move a sink twelve feet across a room, and the drain has to drop three inches along the way. Sometimes the floor structure allows that. Sometimes it does not.
Knowing this early changes the layout conversation. It does not have to kill the idea. It just needs to be part of the budget rather than a surprise in week three.
Island Placement Against Traffic Flow
Islands get sized by how much counter space someone wants. That is backward.
Size an island by the space left around it.
Measure the full room. Subtract the island footprint. What remains is the walkway, and walkways have practical minimums:
- 36 inches for a single-person path
- 42 inches where someone works at a counter
- 48 inches where two people pass regularly or where a dishwasher opens into the aisle
An island that leaves 32 inches of clearance will look correct on a drawing. It will feel wrong every day. Bar stools need another 18 to 24 inches behind them when someone sits down.
Subfloor Level Across the Full Room
Set a long level on the floor in several directions. Note the low spots.
Floors that slope more than a quarter inch over ten feet cause visible problems. Cabinet runs need shimming. Countertops sit unevenly. A dishwasher can end up out of plane with the counter above it.
This one gets missed constantly because bad floors hide under old flooring and old cabinets. Nobody sees the dip until demolition exposes it. Measuring beforehand, even roughly, gives the plan somewhere to put that cost.
Next steps are straightforward. Walk the kitchen with a tape measure and write down these seven sets of numbers before any ordering happens. Bring them to a planning discussion and ask which ones create constraints on the layout being considered. The measurements that get checked twice are almost never the ones that cause problems later.
